I built a Dapp utilizing Waykichain blockchain. Today I’ll show you step by step, how to build one yourself.
NOTE: I am showing the functional parts so I wont go over CSS or styling whatsoever.
So we will be building this minus the CSS.
Try out the Demo …
see the code on github

Wallet
Step 1: download chrome extension wallet WaykiMax.
This is straightforward. Just CREATE WALLET, PASSWORD, DOWNLOAD

Now activate the wallet. It will display insufficient balance.
We need to add some testnet tokens.

TestNet tokens
its simple go to the website & add your address
Example 1:
https://faucet.wiccdev.org/testnet/getwicc/ YOUR ADDRESSExample 2:
https://faucet.wiccdev.org/testnet/getwicc/wYgoC61Qfjgh9dQppMmLjcfc
Example 3 below:

Testnet Tokens added
The below response that means are Testnet Tokens were added successfully.

Activate our account
Go back to the Chrome wallet. Now your wallet should have 10 tokens.
Click: Activate and then Confirm

The wallet is now activated.
Now we need Javascript code to communicate with the wallet.
Luckily thats already been written for us.
Website
We need to start building the website now. Let create an index.html file.

Javascript wallet code
In order to communicate from our website with the chrome web wallet we need to use Javascript code. Waykichain developed Waykibridge which is a way to do just that. We are importing that code into our index.html file below.
import waykibridge into the index.html file.
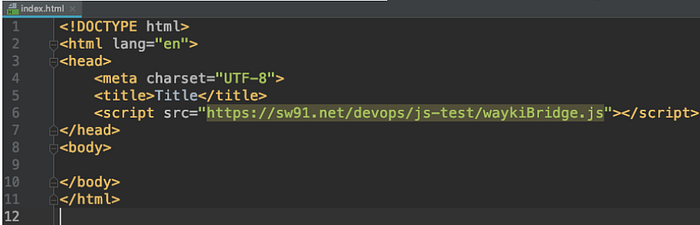
<script src="https://sw91.net/devops/js-test/waykiBridge.js"></script>HTML
We need a : <button> and <p> tag

<button onclick="getWallet()">get wallet</button>
<p id="showAddress"></p>
Javascript
Now we need some Javascript.
see the code on github.

function getWallet() {
    waykiBridge.walletPlugin(
        "getAddressInfo",
        {},
        function (res) {
            document.getElementById("showAddress").innerHTML =
                `<p>Your address:</p><p>${res.result.account.testnetAddress}</p>`
        },
        function (err) {
            console.log(err)
        });
}
Time to test it. Open up the HTML with a Chrome browser.

Ok it works. This is the basic functionality.
NOTE: if you have issues check the code and make sure the Chrome wallet is working by clicking on the icon.
Smart Contract
We need to write a smart Contract.
Go to the online IDE

We will use my smart contract for now and for the rest of this tutorial. In the future tutorial I will go through the smart contract.
Copy the Smart Contract & paste it to the online IDE
Also see the the code on github.
mylib = require "mylib"
--must start with mylib = require "mylib". Be sure to put it in the first line. If the first line is left blank, an exception will be reported.

--Write date into the blockChain
WriteStrkeyValueToDb = function (Strkey,ValueTbl)
    local t = type(ValueTbl)
    assert(t == "table","the type of Value isn't table.")

    local writeTbl = {
        key = Strkey,
        length = #ValueTbl,
        value = {}
    }
    writeTbl.value = ValueTbl
    if not mylib.WriteData(writeTbl) then  error("WriteData error") end
end

--get external call context
GetContractTxParam = function (startIndex, length)
    assert(startIndex > 0, "GetContractTxParam start error(<=0).")
    assert(length > 0, "GetContractTxParam length error(<=0).")
    assert(startIndex+length-1 <= #contract, "GetContractTxParam length ".. length .." exceeds limit: " .. #contract)
    local newTbl = {}
    --local i = 1
    for i = 1,length do
        newTbl[i] = contract[startIndex+i-1]
    end
    return newTbl
end

--save to the chain create user input ability
SaveHelloToChain = function(contextTbl)
    WriteStrkeyValueToDb("name",contextTbl)
end

--table to String
Serialize = function(obj, hex)
    local lua = ""
    local t = type(obj)

    if t == "table" then
        for i=1, #obj do
            if hex == false then
                lua = lua .. string.format("%c",obj[i])
            elseif hex == true then
                lua = lua .. string.format("%02x",obj[i])
            else
                error("index type error.")
            end
        end
    elseif t == "nil" then
        return nil
    else
        error("can not Serialize a " .. t .. " type.")
    end
    return lua
end

Unpack = function (t,i)
    i = i or 1
    if t[i] then
        return t[i], Unpack(t,i+1)
    end
end


----Entry function of smart contract
Main = function()
    -- cant save a string directly to the blockchain it must be converted to hex
    local key_lenTbl = GetContractTxParam(1 ,4)
    local key_len = mylib.ByteToInteger(Unpack(key_lenTbl))
    local keyTbl = GetContractTxParam(4 +1,key_len)
    local value_lenTbl = GetContractTxParam(4 + key_len + 1 ,4)
    local value_len = mylib.ByteToInteger(Unpack(value_lenTbl))
    local valueTbl = GetContractTxParam(4+key_len+ 4 + 1,value_len)
    local keyStr = Serialize(keyTbl,false)
    WriteStrkeyValueToDb(keyStr, valueTbl)
end
Main()
Deploy the Smart Contract
Just paste in the smart contract and click Deploy

We confirm the deployment with the Chrome web wallet.

Click the Run tab and which returns the Contract Regid

The smart contract was deployed successfully. We have the Contract Regid. The Contract Regid is a representation of the contract address. We will use this later so save it.
Website cont …
We deployed the smart contract. Now we need to build up our HTML & Javascript.
Are next function we will implement is the ability to add a Name & Quote.
HTML
We have 3 input tags and a button.
See code on github.

<input id="contractRegid" type="text" placeholder="Contract Regid..."/>
<input id="yourname" type="text" placeholder="Your Name..."/>
<input id="yourquote" type="text" placeholder="Your Quote..."/>
<button onclick="addName()">Save</button>
JavaScript
We have two functions.
One function will transform our input strings into hex. (This blockchain only accepts the hex format as of now.)
The second function communicates with the Chrome wallet adding the hex data. Now it’s ready to be sent to the blockchain.
See code on GitHub

// add name & quote to the blockchain
function addName() {
    let contractRegid = document.getElementById("contractRegid").value;
    let yourname = document.getElementById("yourname").value;
    let nameLen = yourname.length;
    let yourquote = document.getElementById("yourquote").value;
    let ageLen = yourquote.length;
    waykiBridge.walletPlugin(
        "walletPluginContractInvoke",
        {
            regId: contractRegid,
            contractField: convertToHex(nameLen, yourname, ageLen, yourquote),
            inputAmount: "",
            remark: ""
        },
        function (res) {
            console.log(res)
        },
        function (err) {
            console.log(err)
        }
    );
}
//convert name and age and lengths into hex
function convertToHex(num1, str1, num2, str2) {
    var hex1 = '';
    var hex2 = '';
    var hex3 = '';
    var hex4 = '';
    // for number or decemals
    hex1 = (num1 + 0x10000).toString(16).substr(-2).toLowerCase() + "000000";
    for (var i = 0; i < str1.length; i++) {
        hex2 += '' + str1.charCodeAt(i).toString(16);
    }
    hex3 = (num2 + 0x10000).toString(16).substr(-2).toLowerCase() + "000000";
    for (var i = 0; i < str2.length; i++) {
        hex4 += '' + str2.charCodeAt(i).toString(16);
    }
    return hex1 + hex2 + hex3 + hex4;
}
Test out the code
open up the index.html in the chrome browser.
Fill out your contract RegId, a name, and Quote.

Now to see the results of the transaction
Open Chrome developer tools on mac cmd + alt + I
On the right we can see the response. This response below means the transaction was successful.

Search the name
So to search the name that we added to the smart contract data. We need to implement some code.
HTML -find name on the smart contract
code

<input id="regid" type="text" placeholder="Contract regid..."/>
<input id="name" type="text" placeholder="Your Name..."/>
<button onclick="findName()">Find</button>
<p id="displayName"></p>
JavaScript- find name on the smart contract
Here we are using Waykichian BaaS to call the smart contract. If you look at the postData function call it calls the BaaS api.
code

// call contract to get your name
function findName() {
    let name = document.getElementById("name").value
    let regid = document.getElementById("regid").value
    // use the baas api to post json data to get data from contract
    postData('https://baas-test.wiccdev.org/v2/api/contract/getcontractdata',
        {
            "key": name,
            "regid": regid,
            "returndatatype": "STRING"
        })
    // return data and display data
        .then(function (data) {
                JSON.stringify(document.getElementById("displayName").innerHTML =
                    `<p>Name: ${data.data.key} </p><p>Quote: ${data.data.value}</p>`);
            console.log(JSON.stringify(data));
        })
        .catch(error =>
            console.error(error));
}

function postData(url = '', data = {}) {
    // Default options are marked with *
    return fetch(url, {
        method: 'POST', // *GET, POST, PUT, DELETE, etc.
        mode: 'cors', // no-cors, cors, *same-origin
        cache: 'no-cache', // *default, no-cache, reload, force-cache, only-if-cached
        credentials: 'same-origin', // include, *same-origin, omit
        headers: {
            'Content-Type': 'application/json',
            // 'Content-Type': 'application/x-www-form-urlencoded',
        },
        redirect: 'follow', // manual, *follow, error
        referrer: 'no-referrer', // no-referrer, *client
        body: JSON.stringify(data), // body data type must match "Content-Type" header
    })
        .then(response => response.json()); // parses JSON response into native JavaScript objects
}
Test the code

We have all of the functional parts of the Dapp working.
Great Job! You just created a Dapp on Waykichain.
In the next tutorial I will show you how to write a Smart Contract
